Getting WP Rocket settings right can make a massive difference to your site’s performance. But with so many options, it’s easy to enable something that actually hurts your speed — or worse, breaks your site.
After optimizing 5000+ WordPress sites, we’ve dialed in the exact the caching plugin configuration that delivers the best balance of speed, reliability, and compatibility.
In this guide, we’ll walk you through every single tab and setting — and explain exactly what to turn on, what to leave off, and why. You’ll see throughout the video below we talk about “reliability beats speed”. We NEVER want to sacrifice site reliability and uptime for a small gain in speed as the only thing that’s worse than a slow site, is a site that is down!
Watch the full video walkthrough below, or keep reading for our recommended settings:
Table of Contents
Our Approach To WP Rocket Settings
Before we dive into the settings, it’s important to understand our philosophy. We always prioritize reliability over raw speed scores. There’s no point shaving 200ms off your load time if it introduces a JavaScript error that breaks your contact form or menu.
Every setting recommendation below has been tested across thousands of sites running different themes, page builders, and plugin combinations. These are the settings that work consistently — not just on a clean demo install.
We’ve provided screenshots of the various sections where appropriate, click to enlarge the images.
ALSO NOTE – in some cases there are WP Rocket features that are hidden or note accessible via the web interface and require what they call “helper plugins”. There are a ton of various helper plugins to do all sorts of obscure things or change the default behaviour. Messing with these is really a developer level task. You can see the full list of stable and experimental helper plugins on Github here https://github.com/wp-media/wp-rocket-helpers/tree/master/_wp-rocket-helper-plugin
Dashboard
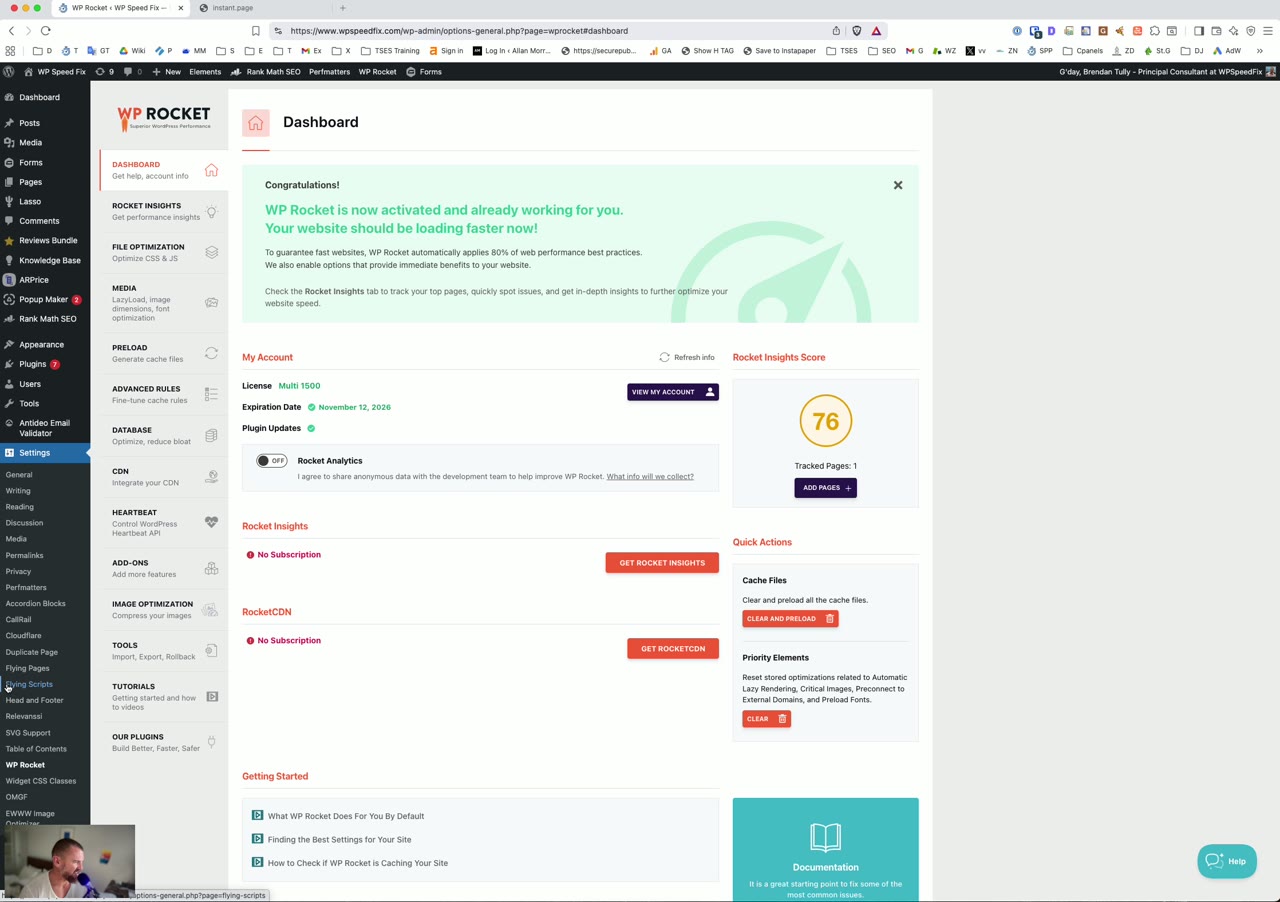
The it Dashboard is your starting point. There’s not much to configure here — it mainly shows your license status, quick actions, and account info. Make sure your license is active and you’re running the latest version of the plugin. WP Rocket frequently releases updates that improve compatibility and performance, so staying current is important.
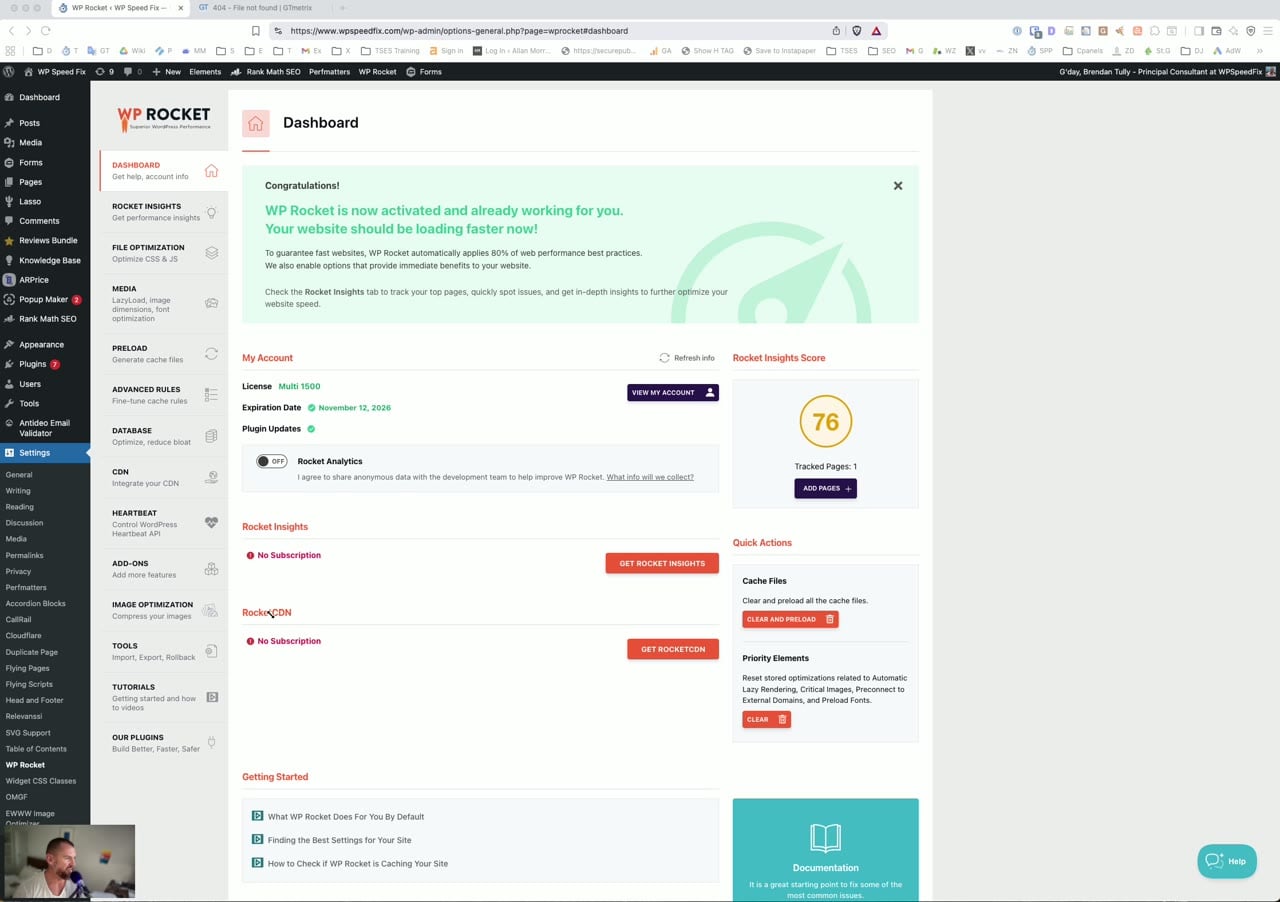
Rocket Insights
Rocket Insights is a relatively new addition. It provides basic analytics and suggestions for your site. While the data here can be useful for a general overview, we wouldn’t recommend making changes based solely on these suggestions without testing. Use it as a reference point, but trust your own testing and real-world performance data over automated recommendations.
Cache
The Cache tab controls the plugin’s core page caching functionality. Here are our recommended settings:
Mobile Cache
Enable caching for mobile devices: ON — This is essential. The majority of web traffic is now mobile, and you need to serve cached pages to those visitors.
Separate cache files for mobile devices: Only enable this if your theme serves genuinely different HTML to mobile users (not just responsive CSS). Most modern themes are responsive and don’t need this. Enabling it unnecessarily doubles your cache size.
Cache Lifespan
We typically leave this at the default 10 hours. If your site content doesn’t change frequently, you can increase this. For very active sites like news sites, you might want to lower it. this plugin automatically clears the cache when you update a post or page, so the lifespan mainly affects pages that haven’t been manually updated.
File Optimization
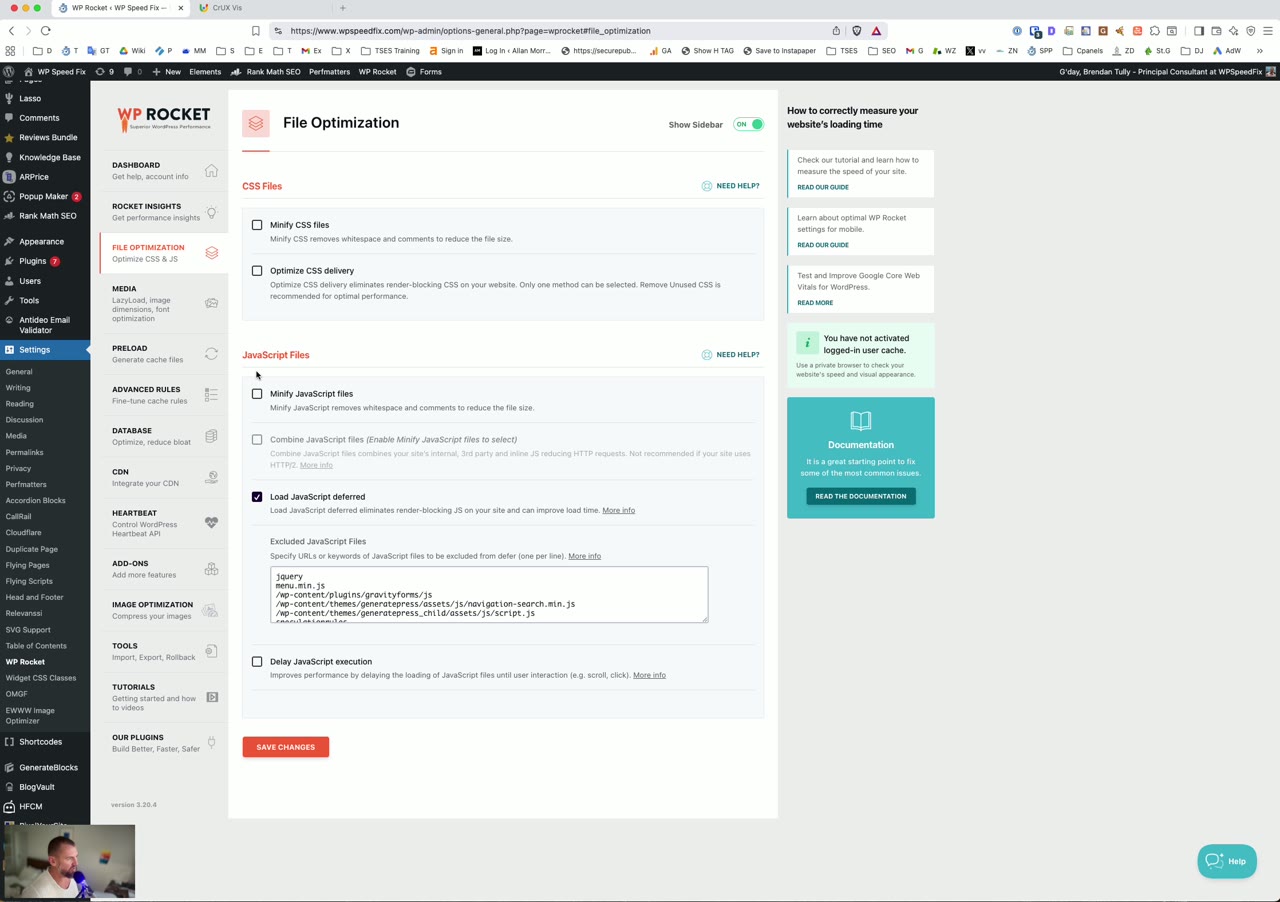
This is where most people get into trouble. File Optimization handles your CSS and JavaScript files, and aggressive settings here are the #1 cause of site-breaking issues with WP Rocket. Here’s what we recommend:
CSS Files
Minify CSS: OFF — Yes, you read that right. We leave CSS minification off. The performance gains from minifying CSS are minimal (we’re talking fractions of a kilobyte in most cases), and it can cause display issues with certain themes. The risk-to-reward ratio simply isn’t worth it.
Combine CSS: OFF — Combining CSS files is an outdated optimization technique from the HTTP/1.1 era. With HTTP/2 (which virtually every modern host supports), combining files actually hurts performance because it prevents the browser from caching individual files efficiently.
Optimize CSS Delivery: ON — This is the one CSS setting you want enabled. It generates critical CSS for your pages, which allows the browser to render above-the-fold content quickly while the full stylesheets load in the background. This directly improves your Largest Contentful Paint (LCP) and eliminates render-blocking CSS warnings in PageSpeed Insights.
JavaScript Files

Minify JavaScript: OFF — Same reasoning as CSS. The savings are negligible and the risk of breaking functionality is real. Most well-coded plugins already ship minified JS files.
Combine JavaScript: OFF — Again, an outdated technique that doesn’t help with HTTP/2 and can cause execution order issues that break your site.
Load JavaScript Deferred: ON — This is critical for performance. Deferred loading tells the browser to download JS files in parallel with HTML parsing but wait to execute them until the page is fully parsed. This eliminates render-blocking JavaScript and significantly improves your Time to Interactive.
Delay JavaScript Execution
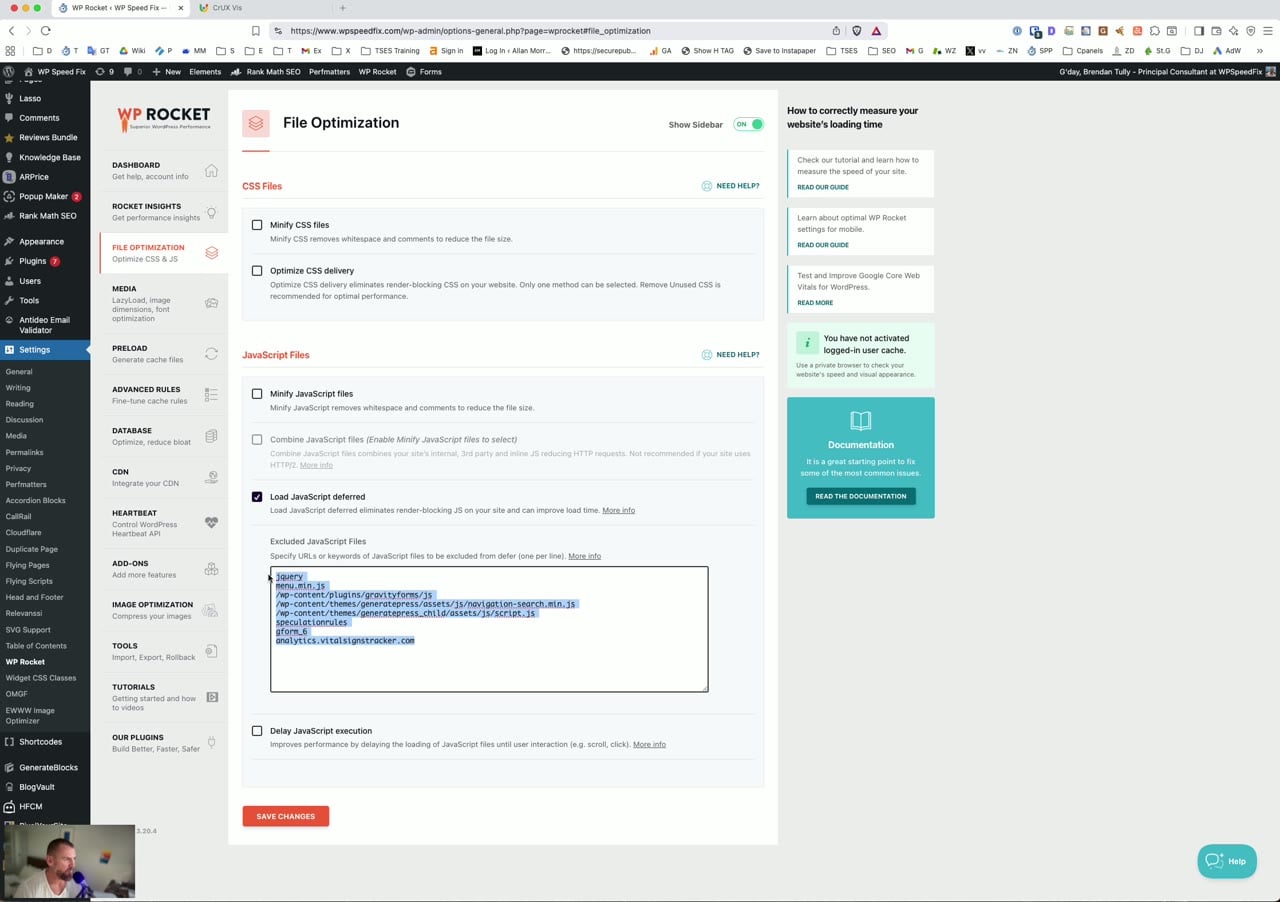
Delay JavaScript Execution: ON — This is one of WP Rocket‘s most powerful features. It delays the loading of JavaScript files until there’s user interaction (mouse movement, scroll, click, or keypress). This dramatically improves your initial page load metrics because scripts like analytics, chat widgets, and social media embeds don’t load until the user actually starts engaging with the page.
However, this is also the setting most likely to cause issues. Some scripts need to run immediately for the site to function properly. That’s where exclusions come in.
Delay JS Exclusions
You’ll almost certainly need to exclude some scripts from delayed execution. the plugin has a helpful One-click Exclusions section that lets you easily exclude common plugins. Based on our experience, you should exclude all themes and plugins from Delay JS for maximum compatibility.
Check the One-click Exclusions section for any plugins you have installed and add them as needed. If something on your site breaks after enabling Delay JS, the culprit is almost always a script that needs to be excluded. As per the video, you can check under the Console tab in the browser developer tools for issues resulting from JS delay or defer settings.
Media
The Media tab handles lazy loading and image optimization. Here’s our setup:
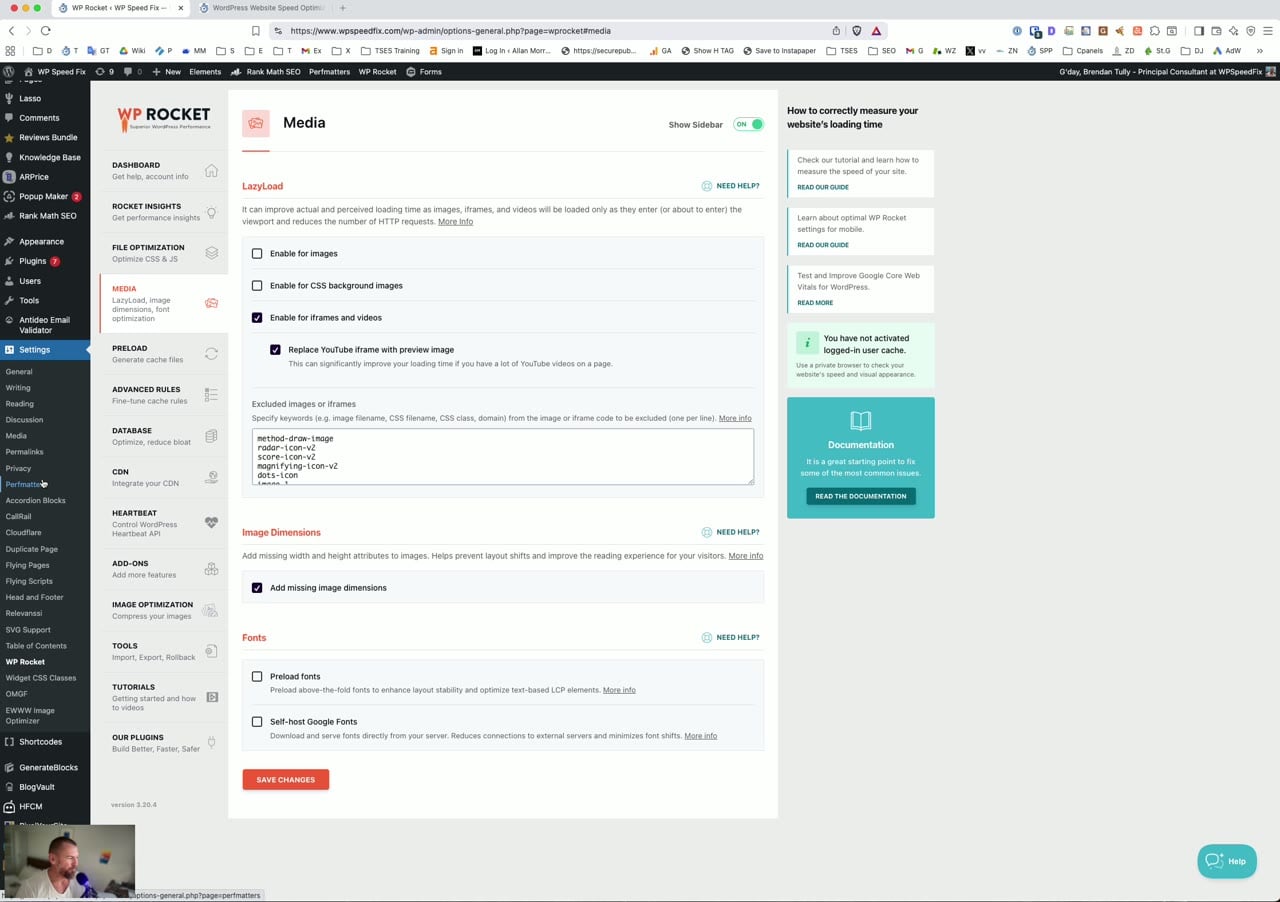
LazyLoad
Enable for images: ON — as per the video, you don’t want to duplicate speed optimization functions. If you’re not using Lazy Loading in your theme or another plugin you want this on.
Enable for iframes and videos: ON — iFrame lazy loading (for YouTube embeds, Google Maps, etc.) benefits can be incredibly heavy so lazy loading will help here. It replaces heavy iframe embeds with a lightweight placeholder until the user scrolls to them.
Replace YouTube iframe with preview image: ON — This is a huge performance win. Instead of loading the entire YouTube player on page load (which pulls in a significant amount of data and is very heavy), the caching plugin shows a static preview thumbnail. The actual player only loads when the user clicks to play. On pages with embedded videos, this can save 0.5mb+ of initial page weight. This optimization is particularly useful on pages with multiple Youtube embeds.
Image Dimensions
Add Missing Image Dimensions: ON — This setting automatically adds width and height attributes to images that are missing them. This prevents Cumulative Layout Shift (CLS) — one of the Core Web Vitals — by telling the browser how much space to reserve for each image before it loads. There’s no downside to enabling this. Be careful with this as it may break rendering on some themes.
Preload Fonts
If your theme uses custom fonts (Google Fonts, Adobe Fonts, or self-hosted fonts), you can add them here for preloading. This tells the browser to start downloading font files earlier in the page load process, which can prevent the flash of unstyled text (FOUT) or flash of invisible text (FOIT) – you would have seen this where a site loads and then the text font changes. This is “FOUT”. You also ideally want to cache the fonts locally BUT if you’re using Cloudflare, it’s better to do that optimization in Cloudflare.
Preload
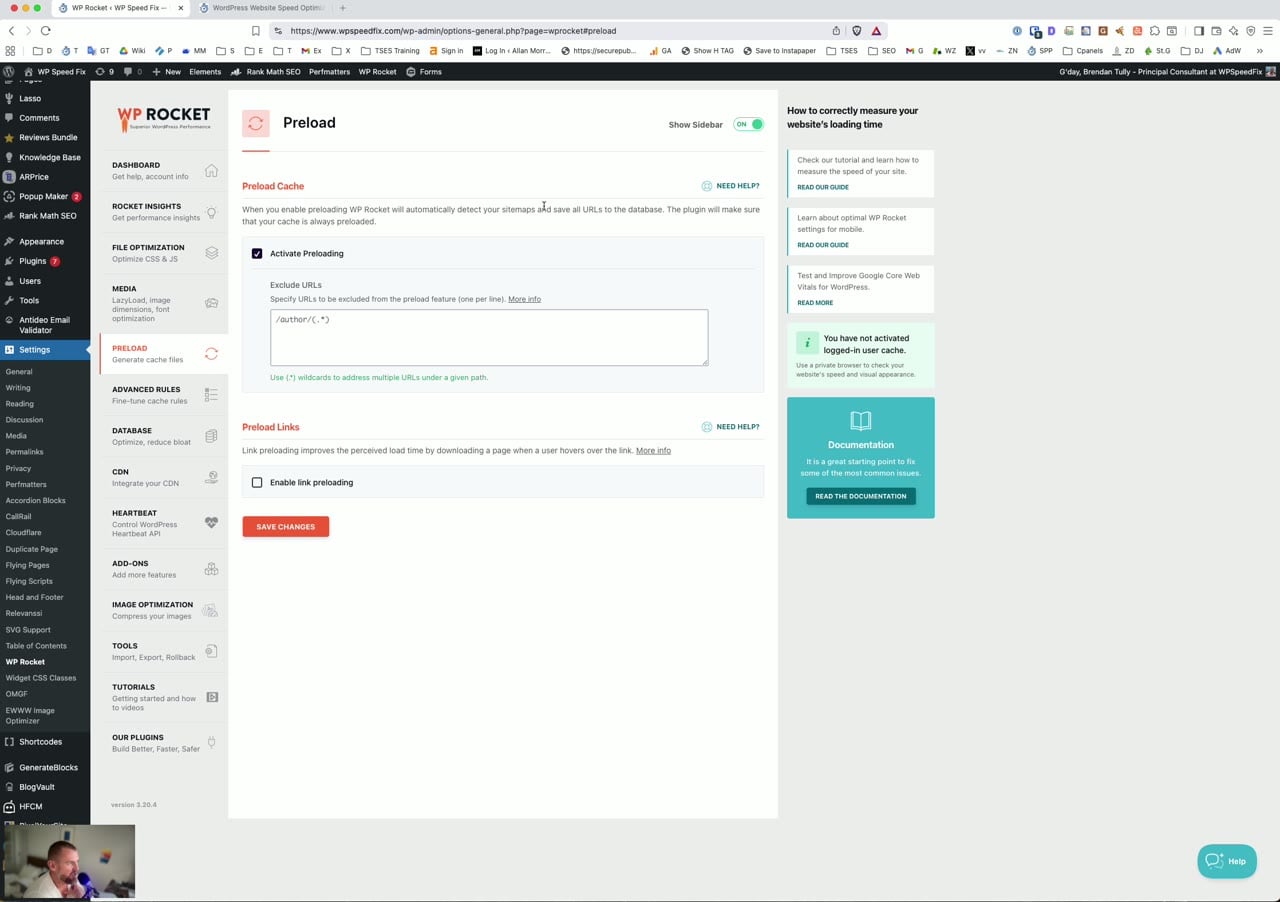
Preloading ensures that cached pages are ready before a visitor arrives. Here are our settings:
Activate Preloading: ON — When you clear your cache (or when a cache expires), WP Rocket will automatically crawl your site and rebuild the cache for all your pages. This means the first visitor after a cache clear doesn’t have to wait for an uncached page to load. It’s essential for maintaining consistently fast page loads.
Enable link preloading: ON — as per the video, this does something called Just In Time Preloading, you can see a demo of it at https://instant.page
You can also configure Preload specific URLs if you have pages outside your normal sitemap that you want to ensure are always cached.
In the Prefetch DNS Requests section, add any external domains your site connects to (like Google Fonts, analytics, CDN domains, etc.) to speed up DNS resolution for those resources BUT we prefer to use Preconnect instead of prefetch DNS as preconnect is an even better optimization.
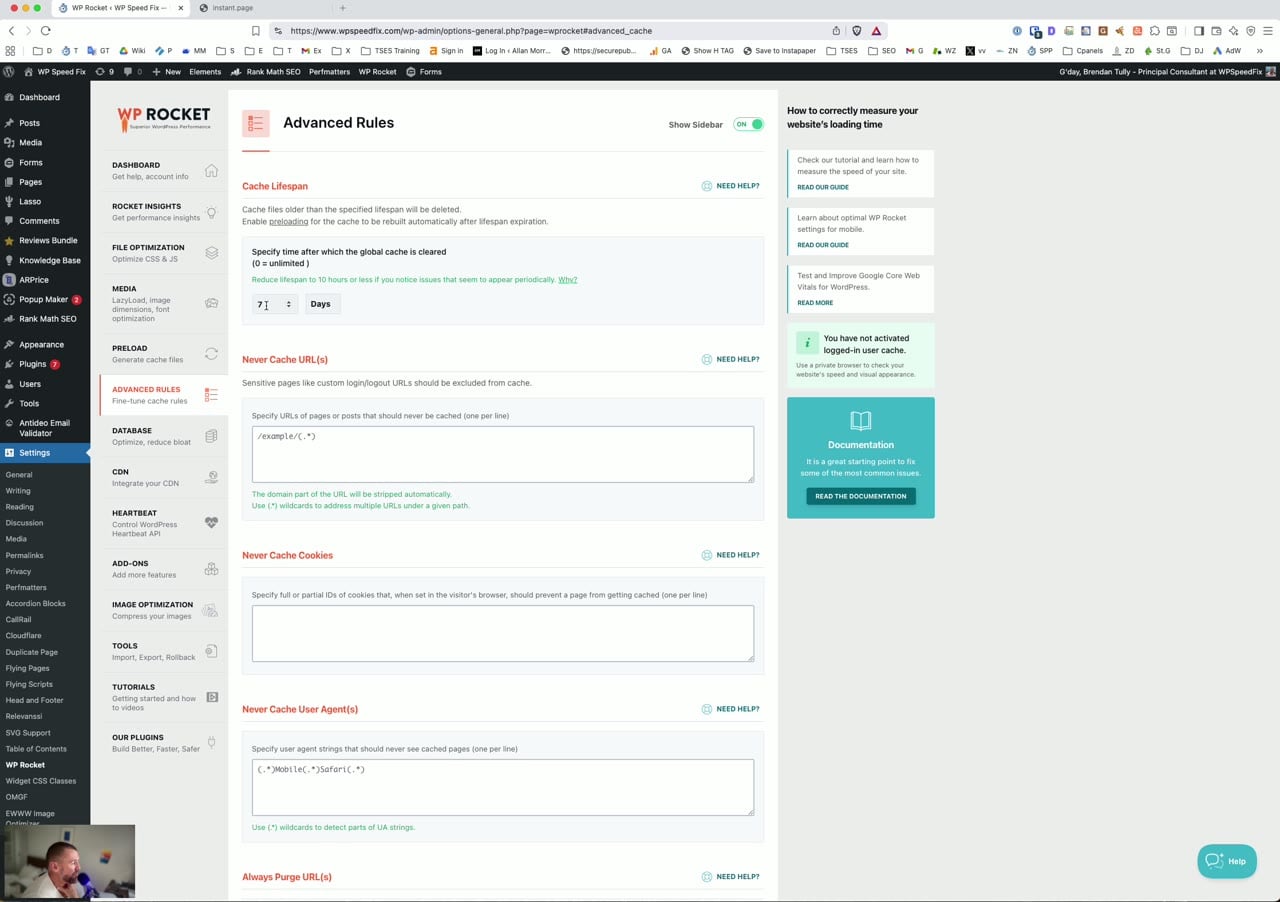
Advanced Rules
The Advanced Rules tab lets you fine-tune what gets cached and what doesn’t. For most sites, the defaults work well. However, there are a few things to be aware of:
Never Cache URLs: Add any pages that should never be cached — like account pages, checkout pages, or any page with dynamic personalized content. WooCommerce and other e-commerce plugins typically handle this automatically, but it’s worth double-checking.
Never Cache Cookies: If your site sets specific cookies that indicate personalized content (like logged-in user cookies beyond the WordPress default), add them here.
Cache Query Strings: By default, URLs with query strings bypass the cache. If you have specific query parameters that don’t change the page content (like UTM tracking parameters), add them here so those URLs still get cached.
Database
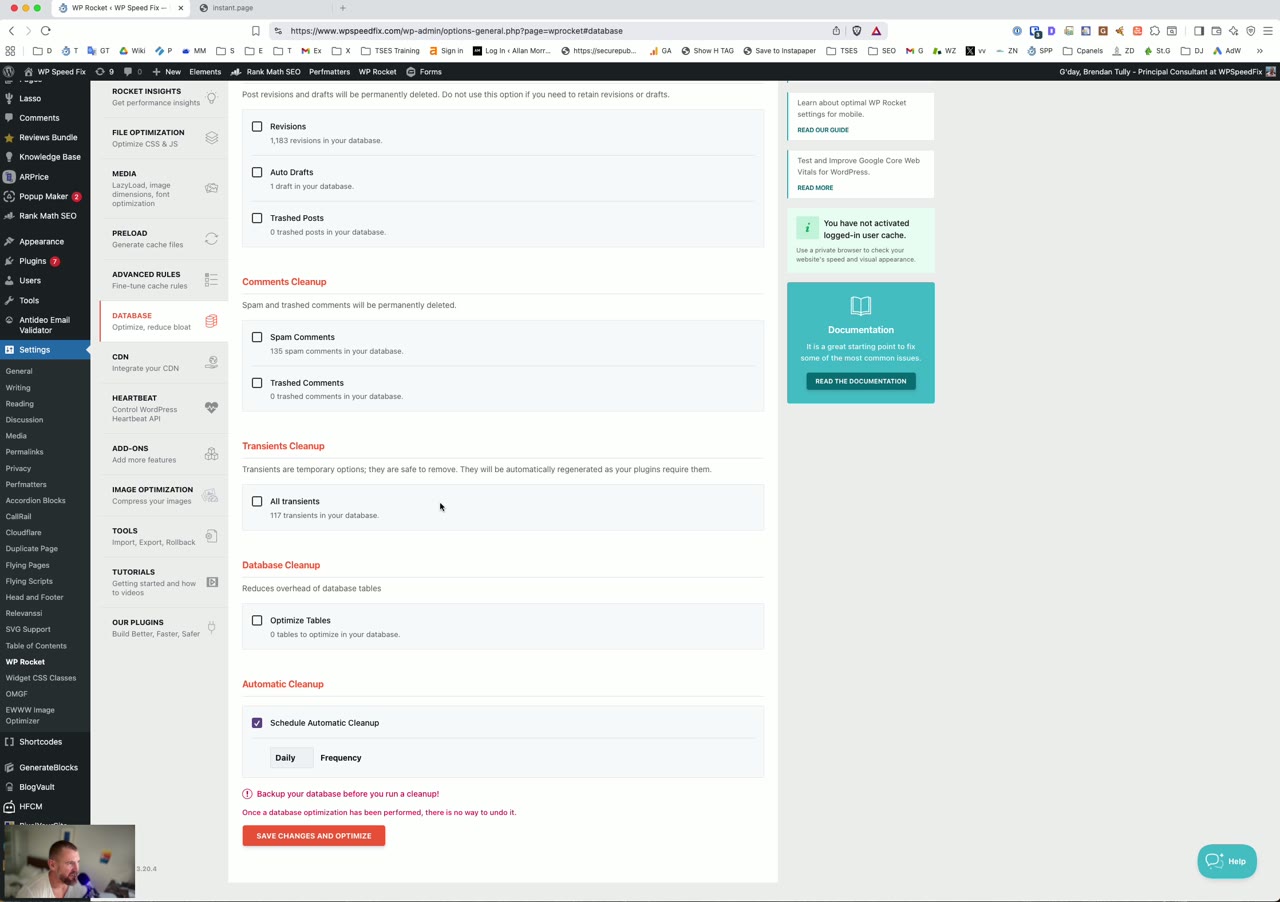
The Database tab provides tools for cleaning up your WordPress database. Our recommendation: use this sparingly and carefully.
You can safely clean up:
- Post Revisions — WordPress stores every revision of every post. On established sites, this can be thousands of database rows. Cleaning these up periodically is fine.
- Transients — Expired transients can be safely removed. These are temporary cached data from plugins.
- Spam and Trash Comments — No reason to keep these around.
We do not recommend enabling the automatic database cleanup schedule. It’s better to run these cleanups manually after taking a database backup. Also, always back up your database before running any cleanup operations.
CDN
Generally we recommend only using Cloudflare for CDN which means this section needs no configuration.
If you’re using Cloudflare, you should be using dedicated Cloudflare add-on (found in the Add-ons tab) instead of configuring the CDN tab. It provides deep integration with automatic cache purging when you update content.
Heartbeat
We’ve never seen performance issues due to the WordPress Heartbeat, leave this section disabled.
Our recommendations:
- Reduce or disable Heartbeat on the front-end — There’s rarely a need for the Heartbeat API on your public-facing pages.
- Reduce activity in the admin area — Setting it to run every 30 or 60 seconds instead of the default 15 seconds reduces server requests without meaningfully impacting the admin experience.
- Leave Post Editor Heartbeat alone — The auto-save functionality in the editor relies on this. Disabling it risks losing unsaved work.
Add-ons
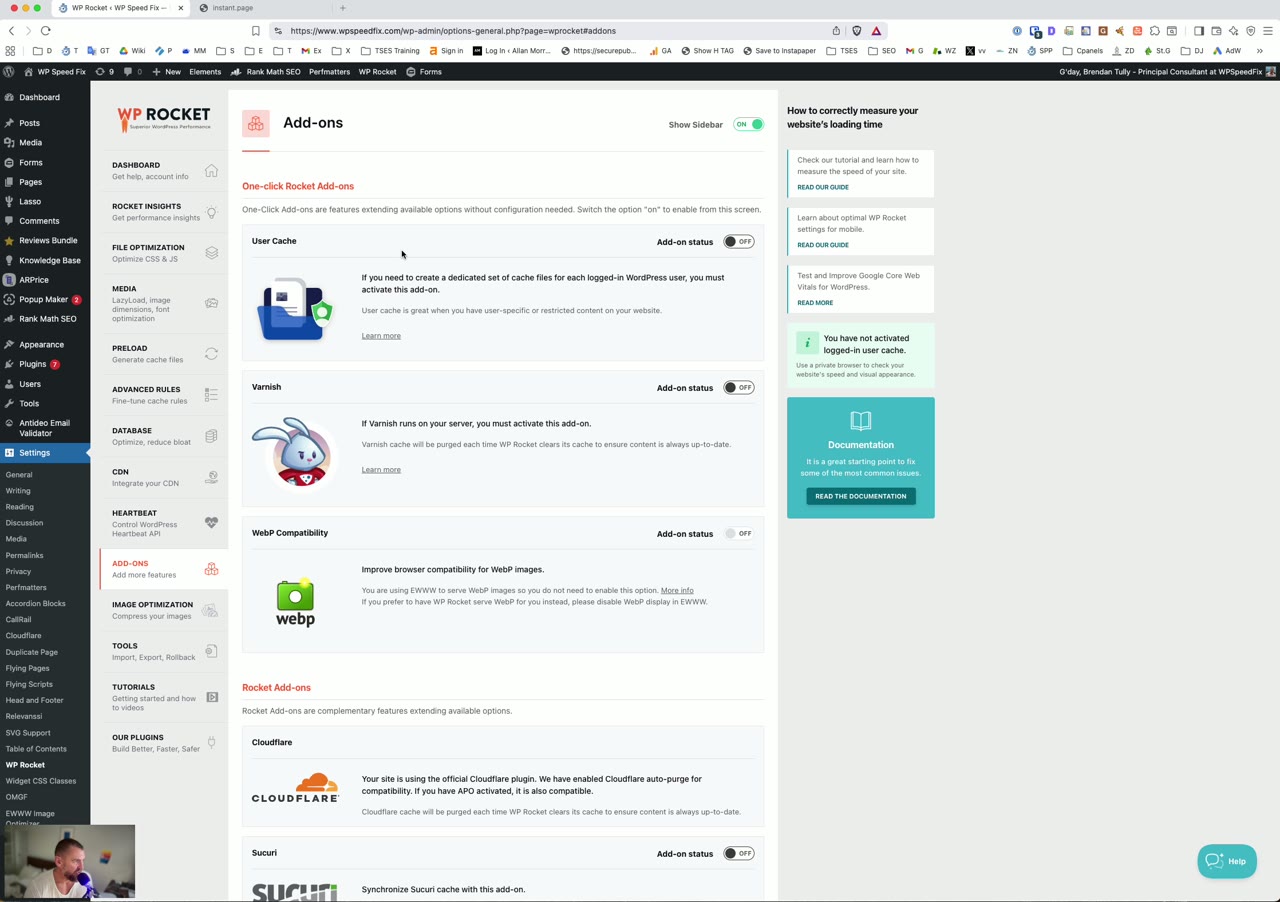
WP Rocket offers several add-ons for specific integrations:
Cloudflare: If you use Cloudflare, enable this add-on and configure it with your API credentials. It allows it to automatically purge the Cloudflare cache when your WordPress cache is cleared.
Sucuri: Similar to Cloudflare — if you use Sucuri’s firewall/CDN, enable this for automatic cache synchronization.
Varnish: If your host uses Varnish caching (not so common any more), enable this so the plugin can purge the Varnish cache alongside its own cache.
Only enable the add-ons that apply to your hosting setup. There’s no need to activate add-ons for services you don’t use.
Image Optimization
Generally our preference is to use EWWW Optimizer for image optimization as it’s a better performing plugin that WPRocket’s separate Imagify plugin.
Tools
The Tools tab provides import/export functionality and some debugging options:
Export Settings: Once you’ve dialed in your configuration, export it. This gives you a backup of your settings and lets you quickly apply the same configuration to other sites.
Import Settings: If you have a proven configuration from another site, you can import it here instead of configuring everything manually.
This tab also shows options to rollback to a previous version of WP Rocket if an update causes issues, and includes beta testing options if you want to try upcoming features.
Final Tips For WP Rocket Performance
A few parting recommendations to get the most out of WP Rocket:
- Test after every change. Don’t enable 10 settings at once. Turn them on one at a time, clear the cache, and test your site thoroughly — especially forms, menus, sliders, and any interactive elements.
- Use your browser’s DevTools console. After enabling new settings, open your site with the browser console open (F12 > Console tab). JavaScript errors will show up here and tell you exactly which script is having issues — making it easy to add the right exclusion.
- Don’t chase perfect scores. A PageSpeed score of 90 with a fully functional site is infinitely better than a score of 100 with broken forms or missing elements. Real-world user experience always trumps synthetic benchmarks.
- Clear your cache after changes. This seems obvious, but it’s the #1 support issue. After making any changes in WP Rocket, always clear the cache before testing.
If you need help optimizing your WordPress site or want us to configure WP Rocket for you, request a FREE site audit here. We’ve done this nearly 5,000 times — and we’d be happy to help with yours.